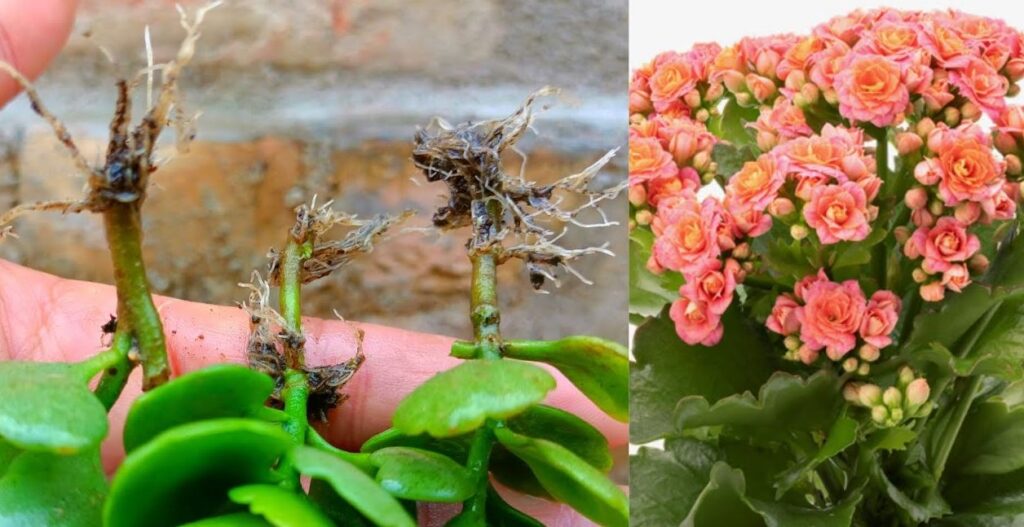
Have you ever wished your Kalanchoe could multiply like magic? Well, get ready to channel your inner plant wizard because today, we’re unlocking the secrets of Kalanchoe propagation! If the idea of turning one vibrant succulent into a whole blooming family excites you, then grab your gardening gloves and let’s dive into the world of Kalanchoe cloning. Trust me, it’s easier than you might think, and the rewards are oh-so-colorful!

Introduction: The Magic of Kalanchoe
Who doesn’t love a plant that practically begs to be multiplied? Kalanchoes, with their vibrant clusters of flowers and easygoing nature, are the darlings of the succulent world. But did you know that turning one Kalanchoe into many is simpler than you might think? If you’ve ever looked at your blooming Kalanchoe and thought, “I want more of this,” then this guide is for you.
Let’s dive into the fascinating world of Kalanchoe propagation and unlock the secrets to expanding your collection of these colorful succulents.
Why Propagate Kalanchoe? (And Why You’ll Love It!)
- Expand your collection: Propagation lets you create numerous new plants from a single parent.
- Share with others: Give the gift of kalanchoe to friends and family.
- Rejuvenate older plants: Propagation can help revitalize leggy or overgrown specimens.
- Gift of Abundance: One healthy Kalanchoe can give rise to countless new plants, perfect for sharing with friends, family, or fellow plant enthusiasts.
- Rescue Mission: Propagating lets you save struggling or leggy Kalanchoes by giving them a fresh start.
- Endless Blooms: Keep the vibrant colors coming by creating new flowering plants throughout the year.
- It’s Fun (and Easy!): Propagation is a satisfying and surprisingly simple way to interact with your plants and watch new life emerge.
Have you ever successfully propagated a plant before? The thrill of watching a cutting turn into a full-fledged plant is addictive!
Methods of Propagation: Which Will You Choose?
There are two main ways to propagate Kalanchoe:
- Stem Cuttings: This involves taking a piece of the stem and encouraging it to grow roots.
- Leaf Cuttings:
- Offsets (or Plantlets): Some Kalanchoe varieties produce tiny plantlets on their leaves, ready to be detached and potted.
Which method seems most appealing to you? Both are relatively easy, but your choice might depend on the type of Kalanchoe you have and your personal preference.
Step-by-Step Guide: Propagating from Stem Cuttings
- Timing: The best time for stem cuttings is spring or early summer when the plant is actively growing.
- Tools: Gather clean, sharp pruning shears or a knife, a small pot, well-draining potting mix (specifically for succulents or cacti), and a spray bottle filled with water.
- Choosing a Stem: Select a healthy stem that’s about 4-6 inches long with at least two sets of leaves.
- Making the Cut: Cut the stem just below a leaf node (the point where leaves attach to the stem). Remove any leaves from the lower half of the cutting.
- Callusing Over: Let the cutting dry out for a few days until the cut end forms a callus. This prevents rot.
- Planting: Fill the pot with potting mix and insert the cut end of the stem about an inch deep. Gently firm the soil around it.
- Watering: Lightly mist the soil with water. Keep the soil slightly damp, but not soggy, as excess moisture can cause rot.
- Patience: Place the pot in bright, indirect light. After a few weeks, you should see new growth, indicating roots have formed.
Step-by-Step Guide: Propagating from Leaf Cuttings
- Select healthy leaves: Choose plump, disease-free leaves from a mature plant.
- Prepare the leaves: Gently twist or cut the leaves from the stem. Allow them to callus over (dry slightly) for a day or two.
- Plant the cuttings: Place the calloused leaves on top of well-draining succulent soil. Mist lightly.
- Rooting: After a few weeks, tiny plantlets will emerge from the base of the leaves. Once they have a few leaves, they can be transplanted into their own pots.
Step-by-Step Guide: Propagating from Offsets
- Identifying Offsets: Look for tiny plantlets forming along the edges of mature leaves. They often have tiny roots already.
- Removal: Gently detach the plantlets from the mother plant. You can use your fingers or a clean pair of tweezers.
- Planting: Prepare a pot with well-draining potting mix. Plant the offsets, making sure the roots are covered and the plantlet is secure.
- Watering: Mist the soil lightly and keep it slightly damp.
- Growth: Place the pot in bright, indirect light and watch your new Kalanchoe plants thrive!
Tips for Success
- Use Well-Draining Soil: Soggy soil is a death sentence for Kalanchoe.
- Avoid Overwatering: Water when the soil is dry to the touch.
- Light, Light, Light: Kalanchoe love bright, indirect light.
- Temperature: Keep them in a warm spot, ideally between 65-85°F (18-29°C).
FAQ: Your Kalanchoe Propagation Questions Answered
1. Can I propagate Kalanchoe in water?
While some plants root easily in water, Kalanchoe isn’t one of them. They prefer a well-draining potting mix to prevent root rot.
2. How long does it take for Kalanchoe cuttings to root?
It usually takes 2-4 weeks for stem cuttings to root. Offsets often have tiny roots already and establish quickly.
3.When should I repot my propagated Kalanchoe?
Repot your new Kalanchoe when it has outgrown its current pot, usually when roots start poking through the drainage holes. This is typically after several months.
4.Can I propagate Kalanchoe from leaves?
Unlike some succulents, Kalanchoe leaves don’t typically root on their own. You’ll have better success with stem cuttings or offsets.
5.My Kalanchoe is leggy. Can I still propagate it?
Yes! Leggy growth is actually a great opportunity for propagation. Take stem cuttings from the healthy parts and give your plant a fresh start.
6. Why are the leaves on my propagated Kalanchoe turning yellow?
Yellowing leaves often indicate overwatering. Let the soil dry out completely between waterings.
7. How often should I fertilize my propagated Kalanchoe?
Once your Kalanchoe is established, fertilize it once a month during the growing season (spring and summer) with a balanced liquid fertilizer diluted to half strength.
8. Why isn’t my Kalanchoe flowering?
Kalanchoes are short-day plants, meaning they need long nights (12-14 hours) to bloom. If your plant isn’t getting enough darkness, it won’t flower.
9. Can I propagate Kalanchoe from seeds?
Yes, you can, but it’s a slower process than propagating from cuttings or offsets. Kalanchoe seeds are tiny and require careful handling.
10.What’s the best way to prevent pests and diseases on my propagated Kalanchoe?
Ensure good air circulation, avoid overwatering, and inspect your plants regularly for signs of pests or disease. If you notice any problems, address them promptly.
Conclusion: A Blooming Future
With a little patience and these simple steps, you can turn one beautiful Kalanchoe into a whole garden of them. The joy of propagating your own plants is a rewarding experience, and Kalanchoes are one of the most grateful plants to work with. So, go ahead and give it a try – your windowsill (and your friends) will thank you!
Ready to start your Kalanchoe propagation journey? Share your experiences, questions, or tips in the comments below. Let’s create a community of Kalanchoe enthusiasts and watch our collections grow!
Also Read:- Desert Rose Care: Your Complete Guide to Growing a Thriving Adenium

